
You want to start using 3D printing but are unsure of where to begin. Do not be concerned; we have you covered. For novices, fused deposition modeling, or FDM, is the most common method of 3D printing. It is simple to use and ideal for crafting enjoyable items at home. A 3D printer, some filament, free 3D modeling software, and a little bit of patience are all that are required.
We will go over all you need to know to start using FDM 3D printing in this article. We'll assist you in selecting a 3D printer within your price range and needs. Next, we'll demonstrate how to search or make 3D models for printing. You will learn how to set up models for printing correctly and choose the best print parameters to get results of the highest caliber. You can quickly design and print your own works of art with a little skill. Prepared to jump in? Move along! Awaiting is FDM 3D printing.
What Is FDM 3D Printing?
Fused Deposition Modeling, also known as FDM 3D printing, is an additive manufacturing technique that uses heat to extrude thermoplastic filament to produce 3D objects.
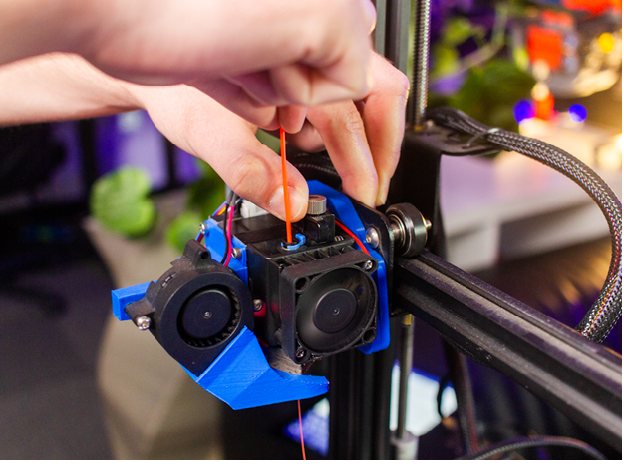
The FDM 3D printer builds the thing layer by layer by feeding plastic filament from a spool through a heated extruder, which melts the filament and puts it onto a base plate. Following the completion of each layer, the base plate descends, enabling the extruder to deposit the subsequent layer on top. This keeps happening till the print is complete.
Some essential information:
- Filament is sold in spools made of either PLA (polylactic acid) or ABS (acrylonitrile butadiene styrene) polymers. PLA is more environmentally friendly and made from plants, but it is also less robust. Although ABS can endure greater temperatures, it emits gases.
- Nozzles are available in various sizes for various levels of intricacy. Wider nozzles print more quickly but provide less detail. Higher resolution is possible with narrower nozzles, but print speeds are slower.
- The resolution in the vertical axis is determined by layer height. Higher resolution is achieved with thinner layers, but print times increase. Thicker layers move more quickly but lose detail.
- Print duration and infill density both impact strength. A longer print time is associated with higher infill, but a stronger, more solid object. Lower infill speeds up production but makes the part weaker.
- Supports are the printed structures that go below protruding pieces. They serve as a surface for printing but must be taken off afterward. Supports enable the printing of more intricate shapes.
- For optimal adhesion and print quality, bed leveling is essential. Poor adhesion and unsuccessful prints will result from an unleveled bed. The majority of printers let you level the bed either manually or automatically.
FDM 3D printing has the potential to generate astonishing outcomes with some tweaking. There are countless opportunities for inventiveness and useful solutions. Now let your imagination go wild!
How Does FDM 3D Printing Work?
So how precisely does FDM 3D printing operate? In actuality, it's quite simple.
A continuous filament of thermoplastic material, such as ABS or PLA plastic, is used by FDM 3D printers.
- The filament is inserted into an extruder, which heats the substance until it melts.
- The molten plastic is then forced onto the build plate by the extruder.
- Moving in three dimensions, the build plate applies layers of molten plastic in accordance with the computer model.
- The plastic instantly hardens, enabling the application of the following layer directly on top. Until the full model is built, this process is repeatedly repeated.
The extruder's passes cause the build plate to progressively descend. Because the layers are so thin, they immediately unite to form a single solid piece. The size of the extruder opening determines the level of detail that can be produced. More complex details are possible with finer nozzles.
With additive 3D printing, the object is constructed layer by layer. Complex structures that would be challenging to manufacture using conventional manufacturing methods can now be created because to this. Your imagination is the only restriction!
It's a fascinating sight to see an FDM 3D printer in action if you've never seen one before. It almost seems like magic to watch as the extruder whirls about, depositing threads of melted plastic that build up into a real, three-dimensional object right before your eyes. The best part is that you can control this kind of magic yourself with a little bit of knowledge and the appropriate tools!
Pros and Cons of FDM 3D Printing
One of the most well-liked and reasonably priced 3D printing methods is fused deposition modeling, or FDM, but there are several advantages and disadvantages to take into account before using it.
Pros
- Low price. Both FDM 3D printers and filament are reasonably priced. For a few hundred dollars, you can get started.
- Simple to use. 3D printers using FDM technology are easy to set up and use. Using free software like Cura or Simplify3D, the print preparation procedure is simple.
- A variety of materials. For FDM, a variety of filaments like PLA, ABS, TPU, PETG, and others are available. Each offers unique qualities, allowing you to pick the one that best suits your requirements.
- Significant build volume. Large items can be created by FDM 3D printers, some measuring up to 1 cubic meter in volume.
Cons
- Reduced resolution. A visible layering effect is produced by FDM 3D printed objects, which typically have a layer resolution of 100 to 500 microns. This might not be the best solution for intricate pieces.
- Distorting and contracting. As they cool, some filaments, like ABS, are prone to warping, curling, and shrinking, which can impair the precision and quality of the parts. The right settings for the cooling fan, ambient temperature, and heated bed are crucial.
- Sluggish print rates. FDM 3D printing is often slower than other technologies like SLA or Poly Jet, despite speed improvements. Depending on the size and resolution, printing a part can take from a few hours to more than a day.
- Strict material limitations. In comparison to injection molded parts, FDM 3D printed products often have lesser strength and temperature resistance. Water resistance and weather ability are also limited by the material and layers.
- Post-processing is necessary. To get a flawless surface on FDM 3D printed objects, sanding, priming, and painting are typically necessary. Cutting and sanding may also be necessary for support removal.
FDM 3D printing can be a terrific approach to start with quick prototyping and small-scale manufacturing if you grasp its advantages and disadvantages. You can create high-quality parts for a range of applications with a little experimentation. For makers, amateurs, schools, and small enterprises, desktop FDM 3D printers are the perfect solution because of their low price and diversity.
Getting Started With FDM 3D Printing
There are a few necessary items you'll need before you can begin FDM 3D printing. Once you have the proper tools, making your own 3D prints won't take long.
3D Printer
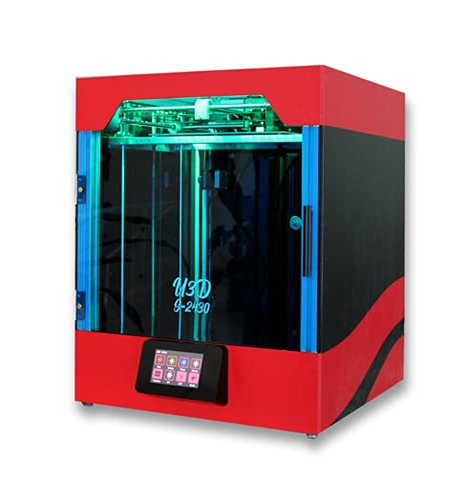
The most crucial component is a 3D printer. Fused deposition modeling (FDM) printer like U3D S2430 is good options for novices. These can print with a variety of filaments and are inexpensive and simple to use.
Filament
You will require filament, the substance used by the printer to produce objects. ABS and PLA filaments are ideal choices to start with. While ABS is more robust, PLA is derived from plant starch and is biodegradable. Both materials come in 1kg spools that cost between 80 AED and 90AED and can be used to print numerous little things.
3D Model Files
To communicate your design intentions to the printer, you will need digital 3D model files. On websites like Thingiverse, CGTrader, and MyMiniFactory, you can discover free models. Or, to create your own models, learn how to use 3D modeling programs like Blender, Sculptris, or Solidworks.
Slicing Software
The 3D model files are transformed using slicing software into directions for your particular printer. Popular free choices include PrusaSlicer, Simplify3D, and Cura. To acquire the greatest prints, you can resize, position, and edit the models using them.
Other Useful Tools
A scraper to remove prints off the bed, gloves, tweezers, calipers, and a tool knife are additional helpful equipment. To increase adhesion, washing the print bed with isopropyl alcohol is recommended. Additionally, you might want an enclosure, particularly if printing ABS. You'll be making incredible 3D prints in no time with a little perseverance and practice. Have fun playing and learning how different parameters effect your prints by starting with some basic things. A fascinating hobby with numerous opportunities is FDM 3D printing.
FDM Printing Tips and Tricks
Following the setup of your FDM 3D printer, what are some pointers to assist you start printing successfully?
Slowly increase the print speed
Start off with a slower print speed when you first start 3D printing, such as 30–40 mm/s. This will allow you some time to observe how your printer functions and guarantee high-quality prints. You can progressively raise the speed in 5–10 mm/s increments as you get more at ease. The majority of conventional FDM printers can print smoothly at 50 to 80 mm/s.
Level the print bed
One of the most frequent causes of unsuccessful prints is an unleveled print bed. For the best adhesion of the initial layer, ensure that your print bed is level. The majority of printers contain corner screws or adjustable knobs for the bed. Before each print, go through the bed leveling process on your printer.
Clean the print bed
Filament can become unstick when printing if there is dirt, grease, or debris on your print bed. For cleaning the majority of common print surfaces, including glass, PEI, and blue tape, isopropyl alcohol works excellent. Before each print, use isopropyl alcohol to gently clean the entire print bed.
Increase the first layer height
Your first layer height should be increased to 0.3mm for improved first layer adherence. The filament has a larger surface area to adhere to the print bed as a result. The height can be changed to default after the first layer.
Print with a brim
A single-layer flat ring that protrudes from the bottom of your print is known as a brim. Brims increase the initial layer's surface area on the print bed, avoiding warping and enhancing print quality. After printing, brims are simple to remove and leave no remnants.
Start with a test print
Start with a straightforward test print, such as a calibration cube or benchy boat, to get a feel for your FDM 3D printer. Before moving on to more complicated prints, test prints let you see how factors like temperature, speed, and retraction affect your print quality.
Start with a straightforward test print, such as a calibration cube or benchy boat, to get a feel for your FDM 3D printer. Before moving on to more complicated prints, test prints let you see how factors like temperature, speed, and retraction affect your print quality.
Conclusion
You now have all the information you require to start exploring the world of FDM 3D printing. You now have the knowledge necessary to understand how FDM 3D printers operate, the several types of filament you may use, and some success strategies. There are countless options for manufacturing and creating. An FDM 3D printer may assist you in bringing your ideas to reality, whether you're interested in manufacturing toys, gadgets, decorations, or spare components. Stop reading right now and start making! Get designing, fiddle with your printer's settings, and let your imagination run wild. Make your mark on the present by shaping the future. Please share your amazing and creative ideas with us; we'd love to see your makes and models. Cheers to printing!


Leave a Reply